If you’ve ever juggled multiple repositories for related projects, you know the pain of syncing dependencies, sharing code, and keeping tooling consistent. That’s where a monorepo shines. By housing all your apps, packages, and configurations under one roof, you get a single source of truth that simplifies dependency management and streamlines collaboration.
Now, why use pnpm and Turborepo 2.0? Simply put, pnpm makes managing dependencies across multiple projects way easier and faster. Turborepo then takes care of running your build and dev tasks efficiently, so you don’t waste time waiting.
Together, they keep your monorepo running smoothly without a lot of fuss—letting you focus on writing code instead of wrestling with tooling.
In this post, I'll share how I setup my monorepo with pnpm and Turborepo 2.0. We'll cover the following topics:
- Monorepo Structure: how I organize my apps, packages, and configurations
- Package Management & Dependency Alignment: how I manage dependencies across my monorepo
- Turborepo Configuration: how I configure Turborepo to run my build and dev tasks efficiently
- Tips: some tips and tricks that can help you make your life easier
Monorepo Structure Overview
When working with a monorepo, organizing your codebase clearly is key to staying productive. My setup uses a straightforward folder structure that groups related projects and shared code into dedicated workspaces. This approach keeps everything tidy and makes it easy to find what you need without digging through a maze of files.
It obviously depends on the project, but here's an example:
apps/
The apps/ folder typically houses my frontend apps. Each app lives in its own subfolder, making it easy to develop, build, and deploy them independently while still benefiting from shared code and configurations elsewhere in the monorepo. If my project needs a more complex backend, I'll create a dedicated api/ workspace.
packages/
The packages/ folder contains shared code that can be used across multiple apps. This includes reusable components, utilities, and types.
config/
The config/ folder contains shared configuration files for ESLint, Prettier, and TypeScript. Usually, you'll find these files in the packages/ workspace, but I find it useful to have a dedicated folder for these files, as it makes it easier to manage them and avoid issues managing packages, particularly when some packages have to be published to npm.
cms/
The cms folder is not something I use in every project, but I had a project recently that needed two instances of a CMS (PayloadCMS in this case), so it came in handy to create a dedicated workspace for it.
Package Management & Dependency Alignment
Turborepo
Turborepo is a powerful build system designed specifically for monorepos. It efficiently manages and pipelines tasks like builds, linting, and testing, helping speed up your development workflow and keep everything running smoothly.
pnpm
pnpm is my package manager of choice because it installs dependencies quickly and uses disk space efficiently by sharing packages across workspaces. It enforces strict workspace dependency rules through the pnpm-workspace.yaml file, which defines your workspace boundaries and prevents accidental or undeclared dependencies from creeping in. Turborepo works seamlessly with pnpm, leveraging its workspace features to optimize builds and caching.
sherif
sherif is a tool that helps you manage your dependencies across your monorepo. It's a great choice for monorepos, as it makes managing dependencies across multiple projects way easier and faster.
Turborepo Configuration
Tasks
At the core of the monorepo’s automation is the turbo.json configuration file. It defines a set of tasks that cover everything from building and developing to linting and migrating databases. Here’s a quick look at the key tasks I typically use:
build: Builds all the apps and packagesdev: Starts all the apps in development modelint: Lints all the apps and packagesformat: Formats all the apps and packagesformat:check: Checks if the apps and packages are formatted correctlymigrate: Migrates the databasetest: Runs all the teststypes:check: Runs the TypeScript type checkertypes: Generates the TypeScript types (for Payload CMS or Supabase for example)
Sometimes, I'll also create a few root tasks, like //#lint:root or //#format:root to run the lint and format tasks at the root of the monorepo.
Environment Variables
Managing environment variables across multiple workspaces can get tricky, strict envMode requires all environment variables to be defined in the turbo.json file.
For this, I create a turbo.json file in each app/package and use the passThroughEnv option, which allows me to pass through environment variables to the tasks.
This strategy ensures environment variables are loaded correctly and consistently across all tasks and workspaces and while deploying on Vercel.
Here's an example of the turbo.json file in the app workspace:
json{ "extends": ["//"], "tasks": { "build": { "passThroughEnv": [ "SUPABASE_URL", "SUPABASE_ANON_KEY", "SUPABASE_SERVICE_ROLE_KEY", "NEXT_PUBLIC_SUPABASE_URL", "NEXT_PUBLIC_SUPABASE_ANON_KEY" ] } } }
Build Outputs
Organizing build outputs cleanly is essential for incremental builds and caching. Here’s how outputs are handled:
- Next.js builds output to .next/**, excluding cache files to keep things lean.
- Distribution files usually go into dist/**, making it easy to locate compiled packages.
- Type definitions for CMS and Supabase packages are generated and stored separately, improving editor support and type safety.
This clear separation of build artifacts keeps your workspace tidy and helps Turborepo optimize build times by knowing exactly what changed.
Here are a few examples:
json{ "build": { "dependsOn": ["^build"], "inputs": ["$TURBO_DEFAULT$", ".env.production.local", ".env.local", ".env.production", ".env"], "outputs": [".next/**", "!.next/cache/**", "dist/**"] } }
Tips
Utility tasks
A smooth developer experience is key to productivity, so this setup includes several handy utility tasks:
format: Formats all the apps and packages with Prettiertypes:check: Runs the TypeScript type checkerlint: Lints all the apps and packages with ESLinttest: Runs all the tests (usually using Vitest or Jest)
Sometimes, I'll also create a webhooks task to listen to webhooks. For example, listen to Clerk's webhooks with ngrok to update the database when a user is created or updated.
Together, these tools reduce friction and let you focus on building features instead of fixing tooling problems.
Tailwind CSS
It is pretty common nowadays to use Tailwind CSS for styling. In a monorepo, it might make sense to have a shared Tailwind CSS configuration in the packages/tailwind workspace.
With v3 and below, the configuration file was tailwind.config.ts, which made it easy to share the configuration across the monorepo.
With v4, the configuration is now CSS-first (though backwards compatible with the old JavaScript configuration), so sharing the configuration is a bit different.
But you can create a package that will contain some shared CSS:
css:root { --color-primary: #000000; --color-secondary: #111111; }
Export it in your package.json:
json"exports": { "./colors.css": "./src/colors.css" }
Then, you can import it in your app:
css@import 'tailwindcss'; @import '@repo/tailwind/colors.css';
Deployment on Vercel
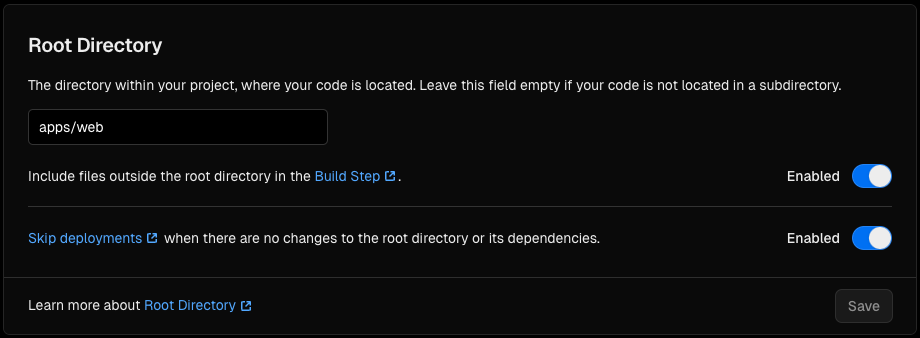
Vercel can detect turborepo automatically, so you don't need to do anything special to deploy your app, apart from setting the Root Directory:
This monorepo setup brings together clear structure, smart tooling, and smooth workflows to create a development environment that just works. By combining pnpm, Turborepo, sherif, and thoughtful config management, you get a scalable and maintainable codebase that keeps your team productive and your projects shipping faster. If you’re managing multiple apps or shared packages, this approach is definitely worth a try.
- Monorepo
- Turborepo
- pnpm
- Vercel
- Tailwind CSS
